VIDEO GUIDES
Each VHS Event and Coaching is listed in the menu, home page or premium page.

STEP BY STEP WRITTEN GUIDES
WRITTEN GUIDE MENU BY CATAGORY

“CAN’T I JUST EMAIL YOU?”
YES. After your purchase, just email us with your name, horse name and test you are riding, and a Vimeo/YouTube link OR request a Google Drive access, then we can do the rest.
HOW TO ENTER A SHOW OR CLINIC - A STEP BY STEP GUIDE
The Virtual Horse Sport system is based on the #1 eCommerce package woocommerce and interfacing with multiple payment options, such as Stripe, Vimeo and PayPal.
Below is a step by step guide to how to purchase and enter any Virtual Horse Sport Event.
- Purchase the Show or Ride & Review Coaching you would like to participate in.
Do you want a Virtual Show? => CLICK HERE TO REVIEW PREMIUMS
Are you a western Dressage Rider wanting coaching? => CLICK HERE TO PURCHASE
Are you a classical Dressage Rider wanting coaching? => CLICK HERE TO PURHASE
Are you a Para Dressage rider wanting coaching? => CLICK HERE TO PURCHASE
2. DID YOU WANT RIDE COACHING? If not go back to step 1 for show entry
Unlike shows, in ride coaching, you can pick which judge you will like help from.
From the product page, scroll down until you find “Available Judges“. Pick the judge you would like help from.

3. Click on Add Cart

5. You have now added a show or clinic to your shopping cart. This may be repeated for as many shows or clinics you like.
6. If you are done with adding shows or clinics, press the View Cart button.

4. You may now review what shows or clinics you have added, as in the example below. You cart will look different.

5. Click on “PROCEED TO CHECKOUT“
6. Fill out your billing information. There are 3 methods of payment: Stripe, PayPal or you may mail a check.
7. Click on “PLACE ORDER“
8. After your payment has been process, you will automatically be taken to a page where all your entry forms will be listed. If you are not ready to fill this out, or don’t have the video completed, don’t worry. You can access these forms later.
HOW TO ACCESS YOUR ENTRY FORMS - STEP BY STEP
There are 4 ways to gain access to each of your entry forms:
OPTION A) ON THE PAGE YOUR ARE TAKEN TO AFTER PAYMENT
It will look something like this. Your entries will differ.

OPTION B) INSIDE YOUR WOOCOMMERCE RECIPT
It will look something like this. You entries will differ.

OPTION C) FROM YOUR ACCOUNT PAGE
It will look something like this. Your entries will differ.
A direct link to this area of your profile is here: https://virtualhorsesport.com/my-account/myEntryforms/

OPTION D) ENTRY EMAIL
As a backup method, the system will send you an email that contains the same information for linking to your entry forms.

THE ENTRY FORM - A BREAK DOWN
This form is used to identify to the show office what class or coaching session you would like to participate in.
1) Uploading the video
The video upload has been simplified into 3 different options.
1) Google drag and drop
2) Using a public YouTube or Vimeo Video link
3) A direct load to the server
4) Request a direct link to google drive.
Pick which method is easiest for you. Most people choose option #1. A direct google drive drop

2) YOUR INFORMATION
Enter in this section of the form, your information about yourself, your horse, which test and what riding status you presently are considered. (Professional, Amateur, Junior, or Young Rider). While not important to any schooling or WDAA, it will help the judge.

3) CHOOSE YOUR JUDGE
If you purchased a schooling show or competition go to form step 4. This field will be missing.
Coaching sessions have no placement in shows and are used by rider to get insight into how they can improve their performances. The coaching sessions offer a lot more training tips, that a judge is allowed to suggest in a competition. In these events, you may choose which judge you would like to help you.

4. YOUR ARENA
Judges are watching for accuracy, but since they are not physically present, knowing the size and shape of the arean you are riding in, helps with accuracy comments. The arena does not have to be perfect or even regulation for coaching. Competition, it needs to be as close as possible. Any variations, please describe.

READY TO ENTER? HIT THE SEND ENTRY BUTTON!
You have reached the finish line. Hit the Send Entry button and you are DONE!

CONGRATULATIONS, YOU HAVE FINISHED YOUR ENTRY
HOW TO FILM YOUR RIDE
Filming your ride is extremely important. That film is the only tool the judge has to giving you correct scores and feedback. But filming does not have to be complicated! Your iPhone, Android phone, iPad or Tablet with a camera, is more than acceptable for filming your ride.
Arena size should be a close approximation for online competitions. If you can not get that, make notes on your entry form.
Follow the Step by Step guideline and get the most out of your ride.
STEP 1 : WHERE TO FILM YOUR RIDE

Take a Video on your mobile phone, tablet or video camera
We recommend 3 different position: At the letter C . Natural light or a very brightly lite indoor arena, where the ride is fully visible at all times. See example below.
STEP 2 : WHERE IS THE SUN?

- Natural light where the ride is fully visible at all times.
- Point the camera away from the sun.
STEP 3: HOW TO POSITION YOUR PHONE
Video should be taken in Landscape not Portrait.
BAD ANGLE : PORTRAIT

GOOD ANGLE : LANDSCAPE

STEP 4: REVIEW - EXAMPLES OF GOOD & BAD QUALITY VIDEO
In order for the judge to see you ride and give you the best possible evaluation, use these pictures as guides of good quality and poor quality video. Always do a test run, taking some video of the arena and reviewing it, before you ride.
Superior example of filming your ride and getting the best possible points
GOOD POSITION.. NEEDS ZOOM

Taken with a iPhone 6
POOR QUALITY

SAMPLE OF WELL FILMED RIDE
GOOD QUALITY

NOT BEST ANGLE or ZOOM

GOOD USE OF ZOOM
STEP 5: HOLD UP YOUR SIGN!
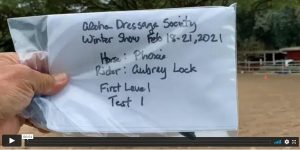
To keep all the videos organized and to assure that a video has been recorded for this particular event. The person taking the video should hold up a sign in front of the phone or camera, indicating your name, horse name, date and test to be ridden. Below is example. Nothing fancy….

SIGN EXAMPLE PRIOR TO STARTING RIDE
STEP 6: WATCH THE ZOOM
BE CAREFUL OF THE ZOOM….BUT STILL SEE THE RIDER!
Some zoom is ok, especially when the rider is going on straight lines. The only time you have to watch zoom is when the rider is doing circles. Be careful! Remember judges only have the video to see the accuracy of the ride. If you zoom in too much, when the rider is circling, filling the screen with only the horse, that perspective is lost, when both sides of the arena can not bee seen.
STEP 7: CONTINUE FILMING UNTIL THE FINAL SALUTE.
Unless you are riding in a WDAA recognized show and doing a western test. Your ride is now complete.
If you need WDAA points, continue to step 8.
STEP 8: REQUIRED ONLY FOR WDAA QUALIFYING RIDES
The Western Dressage Association, enables riders to qualify for national championships based on a points system, including online showing. To receive these points, a filming protocol MUST be followed. Entry and filming practices are exactly the same as VirtualHorseSport.com BUT, at the end of every test you must also add the following:
1. The camera must approach the horse and film the entire length and width of the horse on both sides, without a single video cut/edit.
2. Continuing to video, without a cut, the rider must dismount and drop the bit from the horses mouth, while filming. Show the bit on the video.3. You may stop the video now.
Failure to do these items, will result in rides being disqualified from WDAA points. Effectively, your ride will be disqualified from the recognized section of any VirtualHorseSport.com competitions that are WDAA recognized.
Good links to review are as follows:
USEF/WDAA Attire and Equipment Guide
USEF-Licensed and WDAA Recognized Show Comparisons
WDAA Recognized Online Show Guidelines for Exhibitors
HOW LONG DO YOU KEEP THE RIDES ONLINE?
Rides are kept for a show season ending in November of the show year. For example, if you are showing November 2019 through October 2020, your rides shall be available, online Until November 1, 2020 or longer.
YOUR RESULTS
Getting your results comes in 3 different ways.
- By Text message: Get your overall scores and points.
This also let’s you know immediately, when your detailed scores are available. - By Email: Get your move by move scores via email.
- Review your scores while watching the videos.
This also shows you your percentages and how mistakes can effect your overall score.
1) ACCESS YOUR ONLINE RESULTS IN YOUR PROFILE
Accessing your results in your profile is the best of all worlds. Watch you own ride and view the judges comments, suggestions (coaching only) and scores in a real time setting. Each of the rows is color coded, giving you feedback as to the status of each ride.
To open your ride, click on the bar. Your video and score results will display.

2) TWO WAYS TO VIEW YOUR VIDEO
There are two ways to view your video. The video on top and results underneath…OR Side by Side. How you do that is your choice.


3) SORT YOUR RESULTS
You may also sort this list by test or in the order that you submitted the ride.
